I recently purchased a couple of old battery-powered tube radios on eBay with the idea of using their cases to house a transistor radio project. But these radios were so nice that I couldn't bring myself to tear out the insides! Instead, I decided to refurbish them. But there is one problem with these classics; they require "B" batteries. These batteries supply the plate voltage for the tubes and they are typically 67.5 volts and such batteries are no longer needed in consumer electronics. So, instead of paying an exorbitant price for a "B" battery from a specialty battery manufacturer, I decided to make my own.
The housing for the battery is simply made from heavy paper cut and glued to make a box and the high voltage is obtained by connecting several 9 volt batteries in series. A PDF file has a couple of designs for the battery case. Print the one you like onto heavy paper, cut it out as indicated, fold it up, and glue together! I found it easiest to glue the large side first, then the bottom flaps, reaching inside with a ruler to press the bottom flap down against the tabletop.
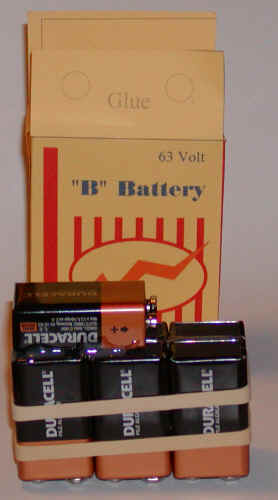
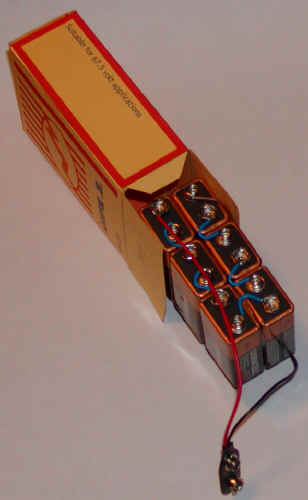
Only seven batteries are used which gives about 63 volts but that is plenty for a "B" type battery; circuits using these batteries were designed to operate over a wide range of voltage to get maximum life from the older carbon-zinc batteries that dropped significantly in voltage over their lifetime compared to modern alkaline types. (If you really want 67.5 volts, see Brian's Idea below.) The batteries are glued together and connected in series with insulated jumper wires. The ends of the battery are connected to a regular 9 volt battery snap with the black wire connected to the positive terminal and the red to the negative terminal. When you are done, make sure that the smaller "male" connector on the battery snap has the positive voltage, just like the 9 volt batteries. If you have an old B battery, you can salvage the connector instead of using the smaller snap as shown here. The battery of batteries is slipped into the case and shimmed with a piece of foam poster board against the exposed battery terminals and a couple of pieces of foam and cardboard to fill up empty spaces. The lid is then glued closed:
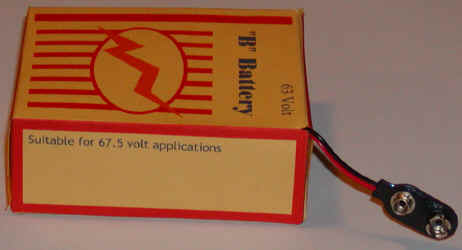

If you happen to have the standard B battery connector, cut out the indicated holes and secure the connector to the inner cardboard with glue and the battery is ready to install. In order to work with my non-standard battery, I modified the connector in the radio by soldering another battery snap to the older battery connector by connecting the black wire to the smaller male connector and the red to the female. Solder the wire to the inside of the connectors where the rivet is located in case you want to return the radio to its "natural" state in the future. This mod is harmless, soldering those rivets is a good idea, anyway!
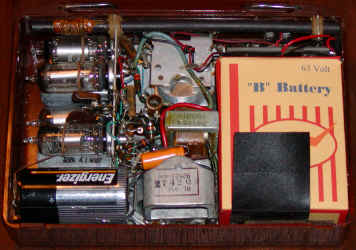
This particular radio uses four tubes and draws about 5 mA so this battery should last a long time. So now what am I going to put my radio project in?
ref: techlib.com/electronics/B-battery.htm


0 comments:
Post a Comment